|
F-15C/F-15E Seamless Intakes
for Tamiya
Cutting Edge Modelworks
S u m m a r y
|
| Catalogue Number: |
CEC32141 - F-15C/F-15E
Seamless Intakes for Tamiya |
| Scale: |
1/32 |
| Contents and Media: |
Three resin parts |
| Price: |
USD$28.99 - available from
Meteor Productions website |
| Review Type: |
FirstLook |
| Advantages: |
Big improvement on Tamiya intake
parts; simple parts breakdown; excellent casting |
| Disadvantages: |
No alignment aids |
| Recommendation: |
Recommended |
Reviewed by Jim Rotramel

HyperScale is proudly sponsored by Meteor
Productions
First of all, before I start: I came up with this
idea and have a close, non-financial association with Meteor
Productions. While I’m truth telling, as you’ll note from the photos,
I’m an average modeler who makes his fair share of mistakes. So, if I
can do this, I bet you can, too!
As anyone who has built the Tamiya 1/32 scale F-15 kit will tell you,
the intakes suck, and not in a good way—sink holes along the bottom,
seams along the sides and, as if that isn’t enough, the USAF didn’t help
things a bit by having the exterior color extend six feet into the
intake. The solution is that the intakes needed to be cut laterally (six
feet into the trunk) instead of longitudinally—something the injection
guys haven’t figured out how to do yet.
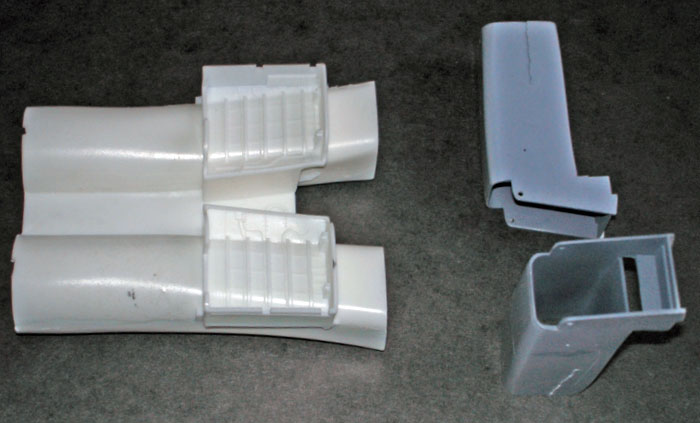
This is (in principle) a simple kit with only three parts—you cut it off
the casting blocks, glue it together and treat it like the kit pieces.
They’re even cast in the right generic colors if you don’t feel like
painting them (paint them anyway). The only trick is the alignment of
the parts. Because of the (difficult) casting process, there are no
alignment tabs, so you have to manually align the pieces so that they
align on the inside—I recommend slow setting, gap filling CA. Also (this
is IMPORTANT), don’t forget to drill out the small holes on the outside
of the front portions for the air data sensors before installing the
assembly in the lower fuselage.
Click
the thumbnails below to view larger images:
|
|

|
|
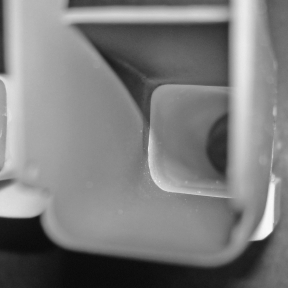
Left outboard seam
|
|

|
|
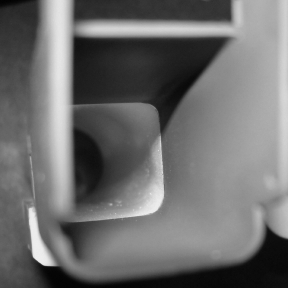
Left inboard seam
|
|

|
|
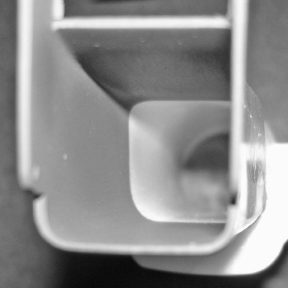
Right inboard seam
|
|

|
|
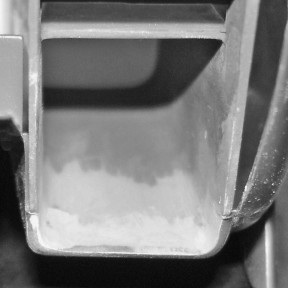
Right outboard seam
|
|

|
|
Exterior seams
|
|
|
|

|
|
Filled, pre-painting
|
|

|
|
Left, pre-painting
|
|
|
|
Left, post-painting
|
|

|
|
The finished product
|
|
|
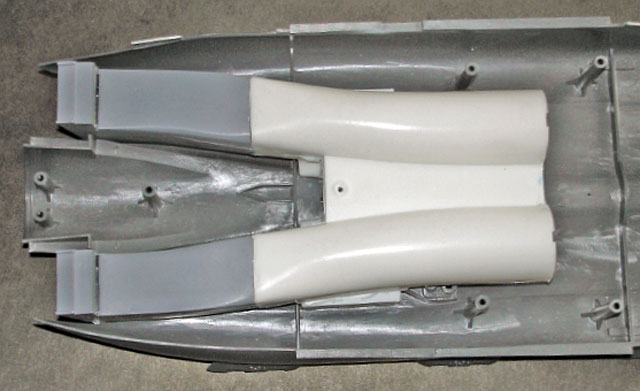
The fit of the parts is snug and no worse than the
kit parts, but that doesn’t mean they are trouble free. There is a nasty
gap where the intakes turn vertical. You can see from the photos that I
filled them without installing the moveable ramps, but I don’t recommend
that. Here is what I think will work best:
-
Paint everything
before assembling the inlets.
-
After (or before)
assembling the inlet pieces, check the fit of the air data sensors
to ensure you’ve drilled the holes wide enough, but don’t install
them yet.
-
Install the movable
ramps.
-
Install the inlet
assembly as per the instructions, but use gap filling CA on the
bottom front of the inlets to secure them when you fill the gap. To
fill the gap, I think you’ll find that CA works better than putty,
just don’t let it set too long before sanding it down! Use
compressed air to clean out the sanding dust.
-
Touch up the paint
where you sanded it away.
-
Use tweezers to
install the air data probes with CA (from the streaks you can see
that were left by the zip kicker, you can tell that that wasn’t a
good idea).
-
Install the
compressor faces.
That’s it. I think you’ll find this kit a real
enhancement to the Tamiya F-15 that is very simple to install.
Thanks to Cutting
Edge Modelworks for the review sample
Cutting Edge Modelworks products, including
Cutting Edge Decals,
can be viewed at Meteor Productions
website
Images and Text Copyright © 2005 by
Jim Rotramel
This Page Created on 04 May, 2005
Last updated
04 May, 2005
Back to
HyperScale Main Page
Back to
Reviews Page |
 Home |
What's New |
Features |
Gallery |
Reviews |
Reference |
Forum |
Search
Home |
What's New |
Features |
Gallery |
Reviews |
Reference |
Forum |
Search