|
U-2R / TR-1 Fuselage Update
 |
|
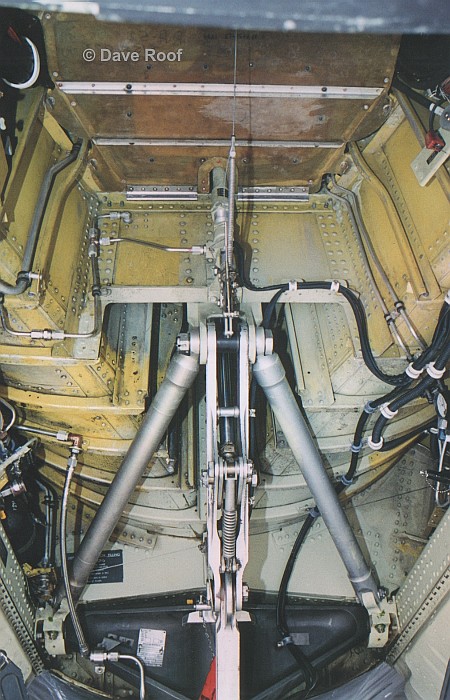
Actual U-2R/S Wheel Bay |
Cutting Edge Modelworks
S u m m a r y
|
| Catalogue Number,
Description and Price: |
CEC48442 U-2R/S/TR-1 Forward
wheel well bay, landing gear, and seamless air intakes |
| Scale: |
1/48 |
| Contents and Media: |
TBA |
| Price: |
USD$19.99
available online from Meteor
Productions website |
| Review Type: |
Preview and Detailed Look |
Previewed by David W. Aungst

HyperScale is proudly sponsored by Meteor
Productions
Cutting Edge is about to release three new update sets for the
late generation U-2. I made the masters for all three sets. I'll
appologize here up front for my enthusiasm about them. I am overjoyed with
the way the resin pieces came out and look forward to using them in my
current U-2S model. I'll try to keep the text objective here and let the
pictures of the pieces do the talking, but my enthusiasm will likely
bubble through.
I am only going to show the peices as they come out of the set in this
review. Expect to see a built-up U-2S in the coming months on HyperScale
using all these sets.
This review is on the Fuselage Update Set (CEC48442).
An Update Set Is Born
This set started simply as me wanting to make a better looking version
of the main wheel well. What Italeri provides in the kit is not
even close to what it should look like. They provide a shallow box that is
not even deep enough to hold the wheels. My first attempt to fix this
(working blind with no real documentation) was nothing more than deepening
the forward section and adding some wiring.
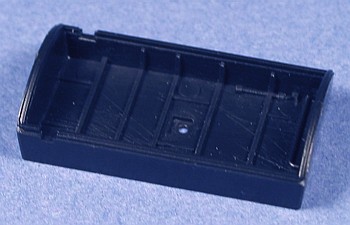
Kit Main Wheel Well |
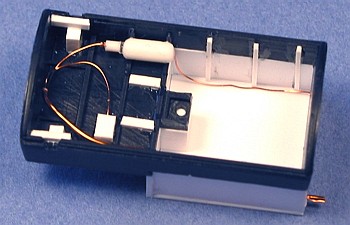
Re-Built Main Wheel Well |
Then, I received a set of pictures from Dave Roof that included a few
main wheel bay shots. Now I had more information on the area than I really
wanted to know. After some long study of the pictures and more than a
little soul searching, I decided to take the plunge and attempt to
scratch-build a new main wheel bay. The scratch-built wheel bay would not
use any of the already modified kit main wheel well, so if I failed in my
attempt to make a correct wheel bay, I could always fall back on the usage
of the modified kit part.
Without getting into a lot of description, I took sheet styrene (mostly
0.030" thickness) and started cutting pieces and assembling them to match
what I was seeing in the pictures. I cut two pieces to be the bulkheads at
the front and rear of the bay. I cut, bent, and assembled pieces to create
the "V" formed by the inner sides of the ducting. I cut a series of
styrene circles and cut them into quarters, then attached them to the
sides of the "V" to act as formers for the rounded outer sides of the
ducting (step 1, below). With this built up, I then skinned the ducting in
0.005" sheet styrene (step 2, below).
The scratch-built unit (up to this point) created the basic shapes of
the wheel bay. After some more dry-fitting of the new unit to verify that
it still fit in the fuselage, I started adding the minor details like
structural ribbing, actuators, and nitrogen bottles (step 3, below). I
added mounting points on the rear wall for the landing gear strut and
built-up the center position where the strut's retraction arm attaches. I
was starting to get rather excited at the look of the new main wheel bay.
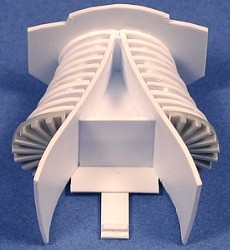
Step 1: Basic Shapes |
Step 2: Skinned Ducting |
Step 3: Details Added |
With this killer wheel bay shaping up, now the kit landing gear strut
just looked bad. I had already cut down the two mounting pivots so the
piece could be added after the fuselage was assembled. I knew I wanted to
add the reinforcing braces, but I was originally thinking that I would not
do anything else to the gear strut. Closer study of Dave Roof's pictures
showed that I could improve the gear strut and, specifically, the
retraction linkage. I set off making a better retraction linkage using
assorted sizes of Evergreen strip and rod stock. I also used
several disks punched out with my Wadron punch set. The results are
shown below.
Wheel Bay Forward Bulkhead |
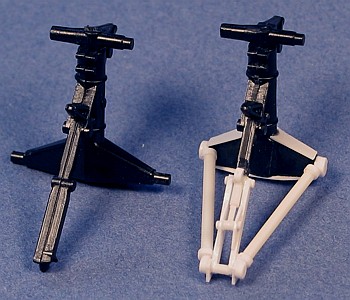
Main Landing Gear Strut: Kit and Re-built |
All along this time I was e-mailing with "Mike B" in Canada. He
commented that I really needed to make these pieces available to someone
to be cast up into a resin update set. This made sense. I wanted to build
at least two U-2R/S models and I sure did not want to do this scratch
building a second time. Since I had worked with Meteor Productions before,
they were the natural choice for me to talk to on this topic. Obviously,
they were interested.
I made a series of modifications to the wheel bay to make it more
cast-able. Most of this related to making the intake ducting into separate
add-on pieces. I also added a bunch of 0.005" sheet styrene relief cuts so
that the main landing gear strut could be cast as a one-piece molding.
Main Wheel Bay, Modified for Casting |
Main Landing Gear Strut, Modified for Casting |
The Update Set Described
The set is made up of 13 pieces. Most are molded in the medium gray
resin that we have come to expect from Cutting Edge. There is also
a small sprue of clear red resin for the anti-collision lights. There were
no molding imperfections in the test pieces sent to me.
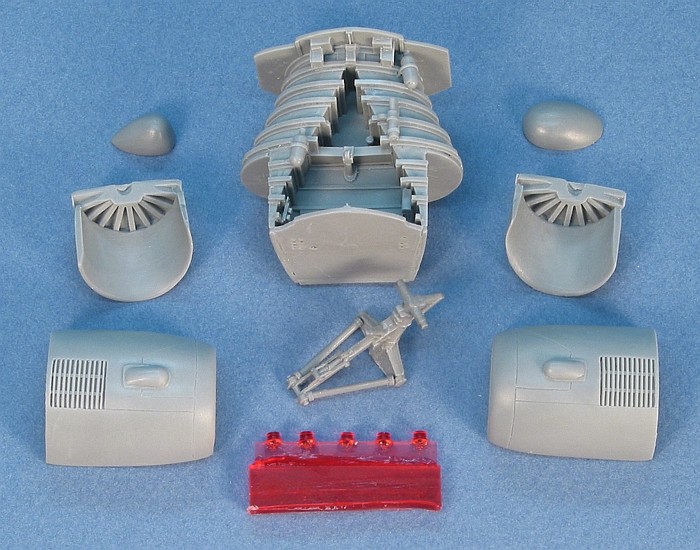
The Full Update Set |
The centerpiece of this set is the full main wheel bay. I am very
impressed at the casting process and how well it captured all the detail
that I had in the original master piece. Casting does have limits on what
it can do, though. Most of the wiring in the wheel bay stands well away
for the inner surfaces. To simplify things, and because I did not want to
incorrectly represent the wiring just for casting purposes, I chose to
leave the wiring off the master piece. It will not be difficult to add to
the casting. Pictures in the instruction sheet provide instruction on
where the wiring is found. Flashed over holes in the front and rear
bulkheads provide location information on the wiring.
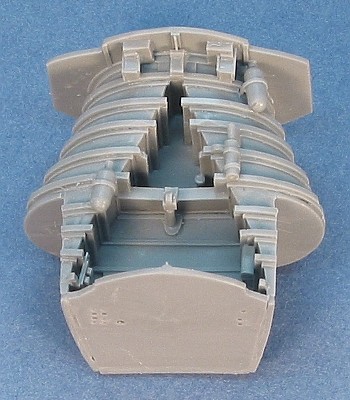
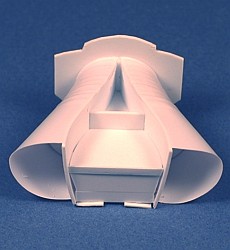
Main Wheel Bay, Looking Rearward |
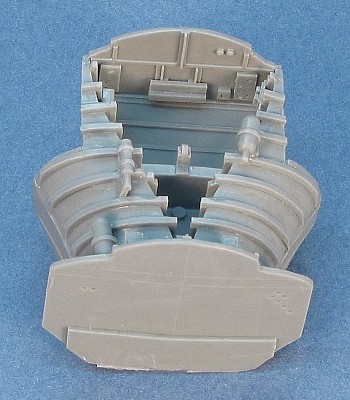
Main Wheel Bay, Looking Foreward |
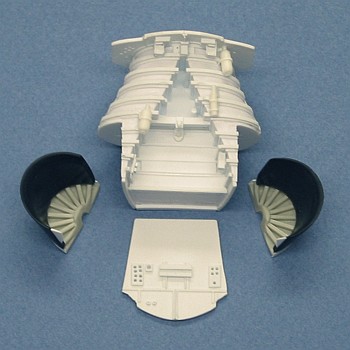
The intake ducting attaches to the sides of the wheel bay as seen
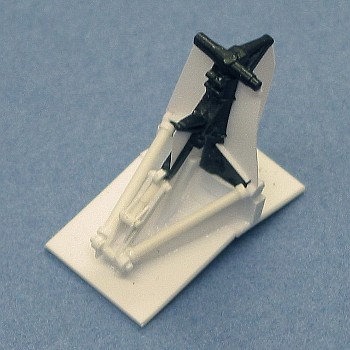
below. The main landing gear strut is a one-piece casting. Fearing the
structural weaknesses that a multi-piece strut would have introduced, I
made a point of trying to get the main landing gear strut to be a single
piece. It means there are some excess mold marks and flash to remove from
the piece, but the strength of a one-piece strut is worth this little
headache.
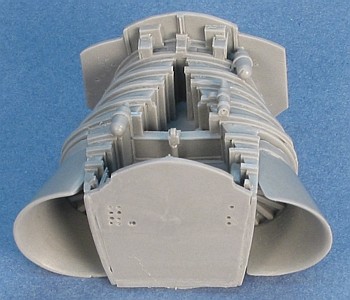
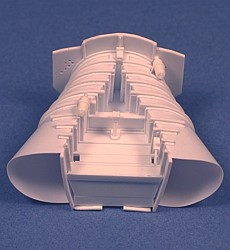
Main Wheel Bay, Ducts Attached |
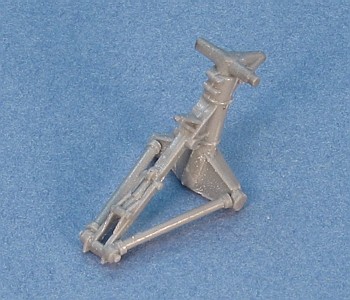
Main Landing Gear Strut |
Extending the ducting forward, the set provides replacement intake
pieces. These are one-piece seamless intakes that directly replace the kit
intake pieces. The ECM blisters found on all the later aircraft are molded
in place on the intake sides. I felt it was easier ot file the ECM dimples
off than it would be to have to add them. Hence, if the aircraft being
modeled does not need the ECM dimples, remove them.
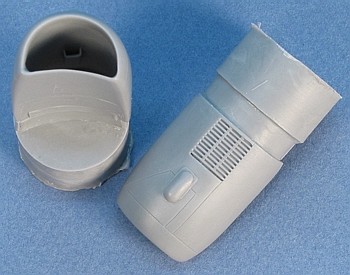
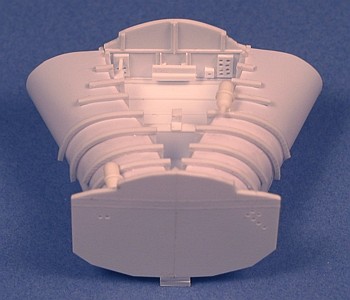
Forward Intake Pieces |
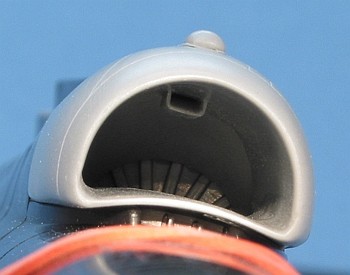
View Back the Assembled Intake |
Beyond the wheel bay and engine intakes, the set also provides a few
items missing from the Italeri kit to update it to more current
configurations. Both the forward and rear data link antenna bulges are
provided. The two bulges reflect the shapes of the later style data link
fairing found on current U-2S aircraft. Also, the PLSS cooling intake
scoop found on the left fuselage side is provided.
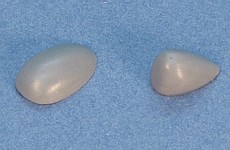
Data Link Bulges |
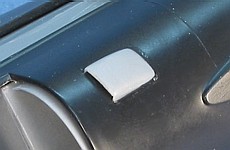
PLSS Cooling Scoop |
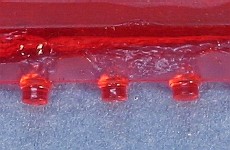
Anti-Collision Lights |
The final items in the set are clear red castings of the anti-collision
lights. The set provides three lights. On early airframes (before the
introduction of Senior Span/Spur), only two lights were on the aircraft.
When the airframe is updated to support Senior Span/Spur, the upper light
is deleted and replaced by two lights moved further back the spine and
separated by about eighteen inches.
I wrote this review to show a little of what goes into the making of a
set of masters for a resin kit update. And, of course, I wrote this to
show off the new set. The castings caught every detail of my original
masters with great clarity. As the designer of the masters, I do not think
it is my place to recommend this set or not. I will let the pictures in
this posting speak for themselves and leave any recommendations to a more
objective reviewer.
As many people have noted, the list of statistics at the end of each of
my project postings makes me a true "bean counter". This posting would not
be complete without listing my time spent on the project. For the record,
on all three U-2R/S update sets collectively, I spent 86.2 hours (5.9 on
research, 80.3 on contruction). Very few models in my built collection
have reached this high a number of working hours. Wanting to build more
than just one U-2R/S (eventually), the time spent here will save me time
in having to scratch-build all these items for each U-2 model that I
build.
(Newest to Oldest)
-
U-2R/S Walk Around by David W Aungst
On-Line
HyperScale Reference, 2003
-
U-2: The Second Generation by Chris
Pocock
World Airpower Journal, Volume 28, AirTime Publishing, 1997
-
Dragon Lady by Ted Carlson /
Toyokazu Matsuzaki
Koku-Fan Magazine, Volume 1996-04, Bunrin-Do Company, Limited, 1996
-
Recce Tech by Paul F Crickmore
Osprey Color Series, Osprey Aerospace Publishing, 1989
-
U-2 Spyplane in Action by Larry
Davis
, Squadron In Action #86, Squadron Publishing, 1988/2002
-
Lockheed U-2R/TR-1 by Jay Miller
AeroFax MiniGraph #28, AeroFax, Inc., 1988
-
Lockheed U-2 by Jay Miller
AeroFax AeroGraph #3, AeroFax, Inc., 1983
Cutting Edge Modelworks products are
available online from Meteor Productions
website
Images and Information Copyright © 2003
David W. Aungst
This Page Created on 21 April, 2003
Last updated
14 August, 2003
Back to
HyperScale Main Page
Back to
Reviews Page |
 Home |
What's New |
Features |
Gallery |
Reviews |
Reference |
Forum |
Search
Home |
What's New |
Features |
Gallery |
Reviews |
Reference |
Forum |
Search