|
F-8A/B/C/D/H/K/L
Airframe Conversion for
Hasegawa F-8E Crusader
Cutting Edge Modelworks
S u m m a r y
|
| Catalogue Number
and Description |
CEC48419 F-8A/B/C/D/H/K/L
Airframe Conversion for Hasegawa F-8E. |
| Scale: |
1/48 |
| Price: |
USD$16.99 |
| Contents and Media: |
Ten pieces in grey resin |
| Review Type: |
FirstLook (test-fitted) |
| Advantages: |
Very clean casting; excellent
detail; lots of alternate schemes available for other variants;
excellent fit; thoughtful engineering; supporting tabs on wing hump
replacement insert; accurate; execution of conversion not as
frightening as it first looks - quite straightforward |
| Disadvantages: |
Small upper fuselage lump in
front of wing must be backfilled and removed (but no big deal); no
locators on nose replacement halves so care is required in alignment. |
| Recommendation: |
Highly Recommended for anyone
wanting to depict an early F-8 |
Reviewed by Brett Green

HyperScale is proudly sponsored by Meteor
Productions
Cutting Edge's 1/48 scale F-8A/B/C/D/H/K/L Airframe
Conversion for Hasegawa F-8E comprises just ten parts in the familiar grey
resin.
This conversion addresses the smaller radar nose and
different vents/details; plus the "humpless" spine on these versions.
The parts are beautifully cast with no imperfections
on my review sample. However, as good as the parts looked, I wanted to see
how well they fitted.
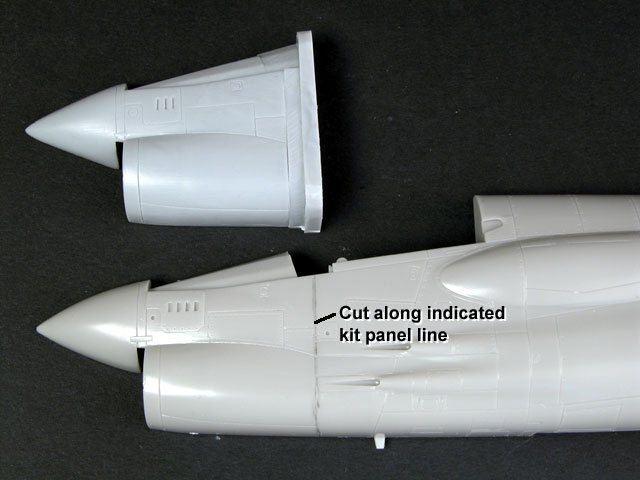
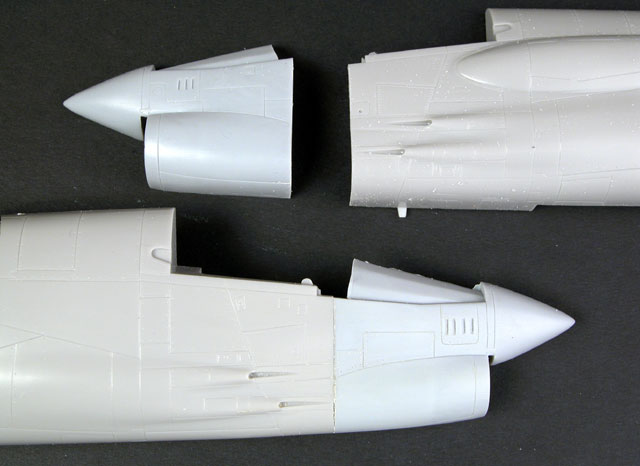
At first glance this looks like a major conversion.
It does require the removal of the entire kit nose and the upper wing
halves to be sliced off the centre section. This prospect will be a little
frightening to many modellers, myself included!
However, I put my fears behind me, armed myself with
a razor saw and started preparing the conversion parts for assembly.
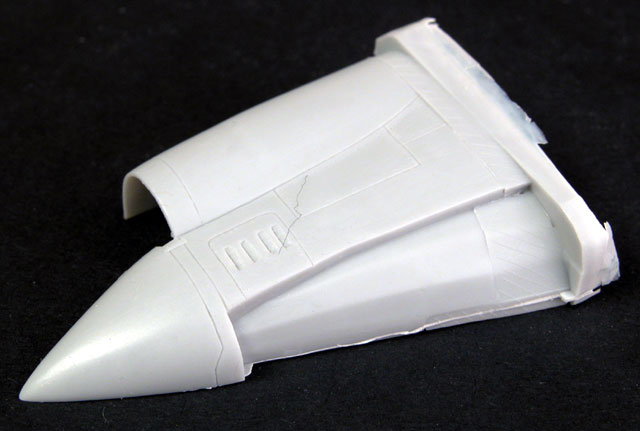
The Nose Section
Preparation and assembly of the replacement nose is
quite straightforward with a little time and care.
The join is along an engraved vertical line so
cutting the kit nose is a simple matter of following the panel. The resin
replacement parts must also be sawn off their casting block. Fortunately,
the resin is thin at the point of release and the separation line is
crisply engraved. Each of the four cuts took no more than 30 seconds.
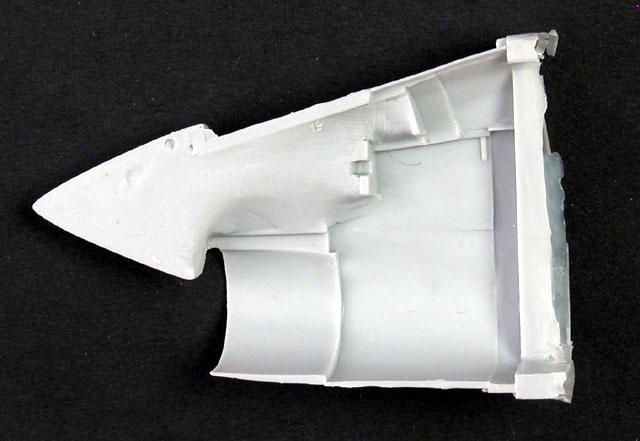
Once the resin parts were free from their blocks,
some excess resin was removed from the instrument coaming. I found it was
easiest to slice this excess material off from inside the part
using a sharp hobby knife.
I also removed the single locating pin on the inside
of the nose cone, as it seemed to be more of an impediment than an
alignment aid.
Click the
thumbnails below to view larger images:
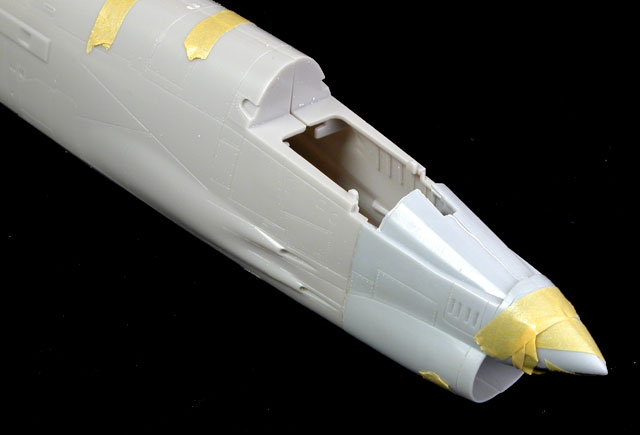
Do not join the resin nose halves yet!
It is absolutely essential for perfect alignment of
the resin nose and the kit parts that each nose half is glued to each
fuselage half before the fuselage is assembled.
I found that the subtle contours of the kit fuselage and
the resin nose matched perfectly, but that some extra resin is cast on the
bottom edge (ie, the bottom is moulded with extra width). This has
presumably been done in favour of trimming rather than filling the bottom
fuselage join. What it means, though, is that the resin nose must be lined
up against the fuselage side, not the lower fuselage centreline.
Care is required when lining up the kit parts with the
resin nose. There are no locating tabs (there is not much room left inside
the fuselage once the intake and cockpit are installed), so the modeller
will be entirely responsible for avoiding ridges and poor alignment.
I found that the parts fitted extremely well. The resin
nose was secured with super glue, and the extra width was trimmed with a
sanding stick while regularly testing the width.
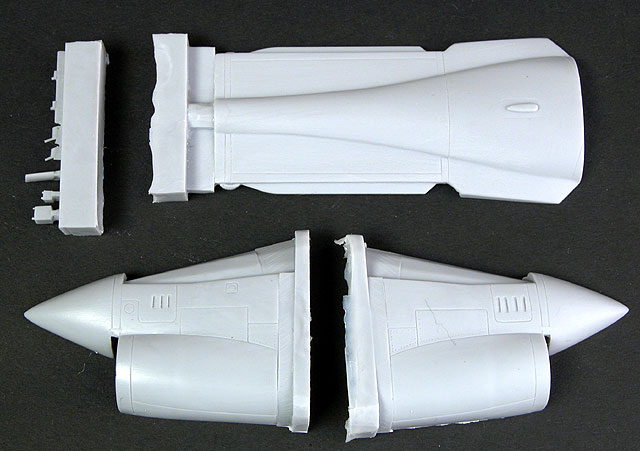
I next fitted the intake ducting parts to the fuselage to
confirm the width and check the fit of the fuselage halves. The ducting
was almost a snap fit and, although the fit of the fuselage halves was
tight, it looks very promising for a gap-free construction.
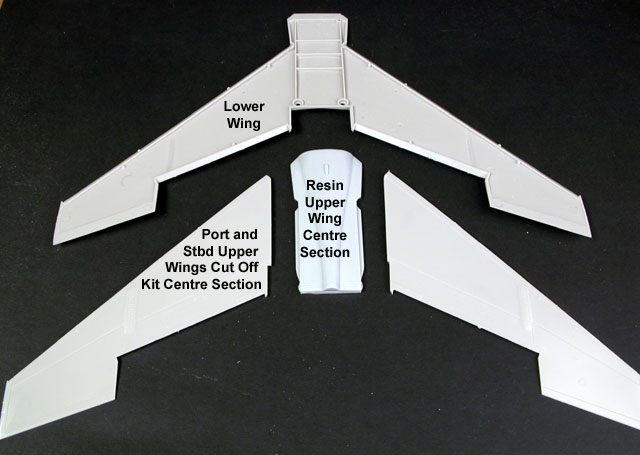
The Humpless Wing
Once again, the cuts take place along a panel line. This
time the panel line is raised.
I scribed along the appropriate panel line, then sliced
the front and back with a razor saw before snapping the wing halves off.
The resin replacement centre section was easily removed from its casting
block with a razor saw.
I decided to use the full-span lower wing as a assembly
jig for the upper wing. I laid the port upper wing on the locating
positions on the lower kit wing then added plastic clamps to hold the
parts in place. The long locating tab on the resin centre section was slid
under the clamped wing. Fit looked good. The starboard wing was then laid
on top of the other locating tab, confirming that the fit was gap-free on
the other side too.
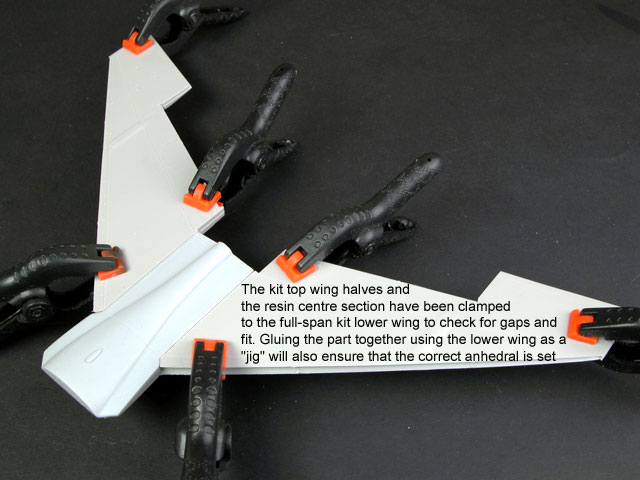
This temporary assembly was then disassembled and super
glue was applied to the tabs. Both wing halves were attached to the centre
section while they rested on top of the lower wing, ensuring that the
correct dihedral was set.
A small hump remains on top of the fuselage in front of
the wing. This will need to be backfilled with putty or super glue, and
cut off the top of the fuselage.
Considering the interesting and colourful options afforded
by early Crusaders, Cutting Edge's 1/48 scale F-8A/B/C/D/H/K/L Airframe
Conversion is very welcome indeed.
Although some cutting of the donor kit is required, the
conversion parts are well engineered to help achieve perfect fit and an
authentic replica of an early F-8 Crusader in a surprisingly short time.
This conversion will be ideal for modellers with some
experience of working with resin parts.
Highly Recommended.
Thanks to Cutting Edge
Modelworks for the preview information
Cutting Edge Modelworks products, including
Cutting Edge Decals,
can be viewed at Meteor Productions
website
Review Text and Images Copyright © 2003 by
Brett Green
This Page Created on 03 March, 2003
Last updated
14 August, 2003
Back to
HyperScale Main Page
Back to
Reviews Page |
 Home |
What's New |
Features |
Gallery |
Reviews |
Reference |
Forum |
Search
Home |
What's New |
Features |
Gallery |
Reviews |
Reference |
Forum |
Search