|
F-16 Airframe
Stiffener Plates
Orion Models
1/72, 1/48 and 1/32 scales
S
u m m a r y
|
| Catalogue Number,
Description, Scale and Price: |
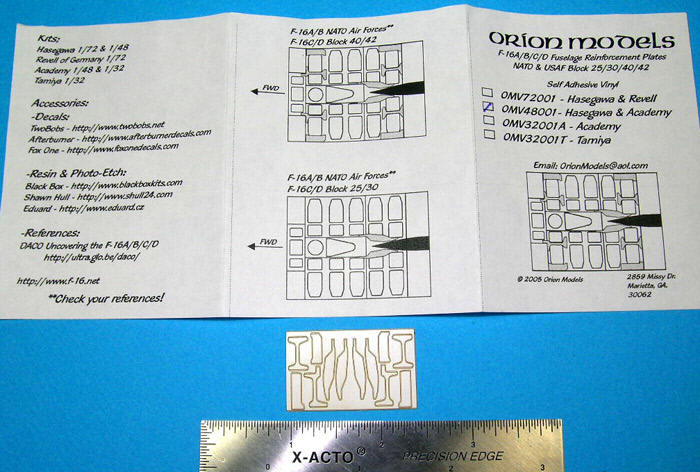
OMV72001 Hasegawa and Revell F-16
(Price $4.00)
OMV48001 Hasegawa & Academy F-16 (Price $6.00)
OMV32001A Academy and OMV32001T Tamiya 1/32 F-16 ($8.00)
available online through
OrionModels@aol.com |
| Contents and Media: |
See text below |
| Review Type: |
FirstLook |
| Advantages: |
Helpful accessory for an authentic
touch. |
| Disadvantages: |
|
| Recommendation: |
Highly
Recommended |

HyperScale is proudly supported by Squadron.com
Reviewed by
Ryan Fernandez
How can one scale plastic model stand out among all the other plastic
models? Simple, it’s in the small details!
It has been a while since I’ve seen new products from Dave Roof’s,
“Orion Model Accessories,” and it seems he has been busy lately. Back in
2000, Orion Model Accessories, today abbreviated to Orion Models,
released their first 1/48 decal sheet ORD-48000 depicting VMFA(AW)-225’s
Vikings F/A-18D Hornet. The decal sheet included a comprehensive
instruction sheet for decal placement/paint markings and even decals for
the ejection seats. I thought it was a nice touch for the formerly new
company! Strange though that the Vikings sheet was followed by decal
sheet ORD-48016 Kuwaiti Air Force F/A-18C/Ds resulting in a mysterious
gap in item numbers that I can’t figure out! Did I miss something?
Joining us once again in the scale modeling world with new products
for mid-2005, Orion Models has introduced a couple of new self-adhesive
vinyl decals in three modeling scales (1/72, 1/48, and 1/32) for the
F-16 Fighting Falcon airframe reinforcement plates (“scab plates”) and
in 1/48 scale alone, AV-8B/GR.5/7 Harrier II MDC, reviewed earlier. Also
available but not reviewed are F/A-18 vertical fin reinforcement plates.
Please note that these new products are not of the water-slide variety!
Tools needed: A good pair of tweezers, light source, a new number 11
blade, toothpicks, pen or pencil.
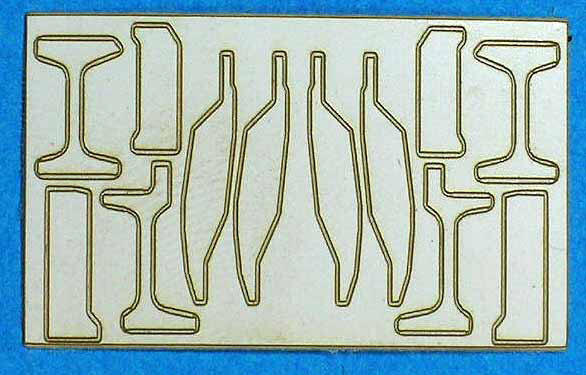
F-16 Airframe Stiffener Plates
First up in my review are the 1/48 external airframe stiffener plates
(or “scab plates” – photo 1) found on current Block 25/30/32/40/42 model
F-16A/B/C/D Fighting Falcons (including European MLU (Mid-Life Update)
F-16s).
These plates were retrofitted to help reinforce the F-16’s airframe
because the USAF’s “lightweight fighter” was now becoming a heavier jet
with newer equipment/weaponry add-ons as the years pass by (sounds
familiar?). Note that Block 50/52 and later F-16s (Block 60 and beyond)
don’t have the plates fitted as they have been strengthened internally
during production.
Until now most modelers trying to simulate the F-16’s stiffener
plates have had to either scratch-build these details with plastic sheet
and only if you had good photo references and/or line drawings, or open
their wallets to obtain the expensive Eduard F-16 1/48 photo-etch set
with the scab plates. The latter of which I have still not been able to
locate because I haven’t a clue what item number it is and the stiffener
plates are definitely not found on both Eduard 48-331 F-16CJ Block 50
set (thanks so much to the modeler who misinformed me) and 48-391 F-16A
PLUS/MLU sets! Yes, let’s see that’s $17.99 and $22.98 respectively plus
shipping and handling! Doh!
Now Dave Roof’s Orion Models has come to our rescue for much less in
price! The scab plates come to you with a well done black & white
instruction sheet indicating decal placement guides for all 10 of the
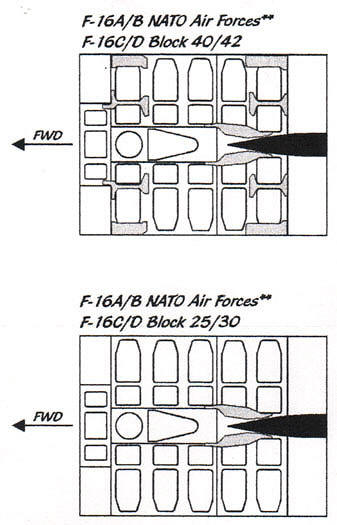
upper fuselage plates seen on USAF F-16s. I got confused though because
the instruction sheet also shows that Block 25/30 jets have only two
reinforcement plates (photo 2 above). I thought they had all 10 too. It
goes to show you that reference material is always helpful, so check
your references. So what about the decals? I’m getting there okay?
The pre-cut scab plates at first glance appear like paper decals and
are easy to use: just peel and stick! I don’t know if they are die-cut
or laser cut but I’d go with the latter. Unfortunately, the scab plates
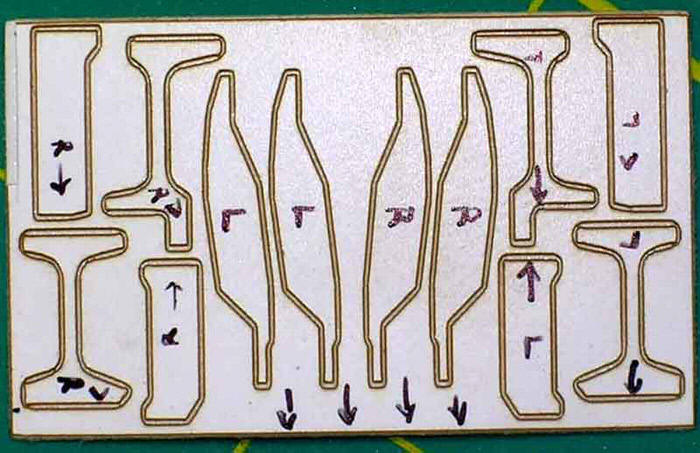
are not numbered so before you go sticking away, stop and check which
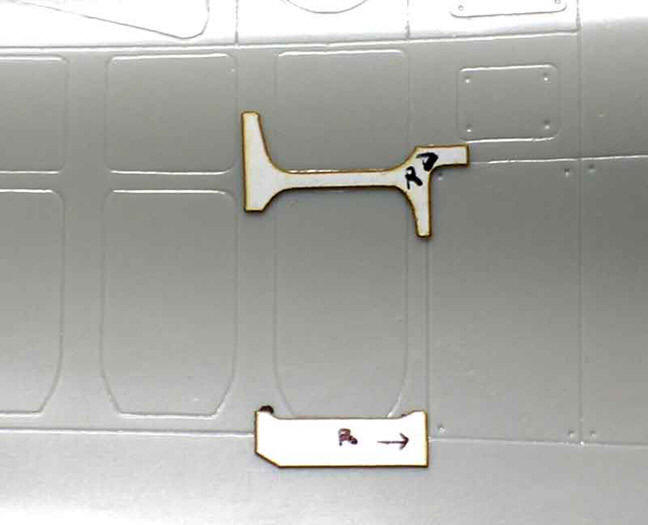
goes where and what way! I labeled each scab plate on mine left (L) or
right (R) (photo 3 below) and its orientation to the front of the model
with a fine-tip Sharpie pen so I don’t go crazy trying to figure things
out while trying to stick it on the model. Prior to applying the vinyl
decals, make sure to wipe down the surface with isopropyl alcohol
(rubbing alcohol) or wash the kit with soapy water and let dry to remove
any oily substances (ex. fingerprints or mold release agents) that may
prevent good adhesion of the scab plates to bare plastic. (I didn’t have
a chance to paint my kit during this review.)
The vinyl goes on easy and can be pulled off if you make a mistake
when applying them on the kit but only if you are careful and work
slowly. Otherwise, from experience with other vinyl-type decals, you can
deform the material by stretching it as it’s pulled off the surface to
be realigned.
You can reaffix the scab plates several times before they start
losing their stickiness so do yourself a favor, do work slowly and do it
right the first time! I suggest placing one end of the decal down first
(photo 4) making sure it’s in the correct position and then work your
way up to the other end to prevent trapping air bubbles underneath.
The decal thickness for the scab plates in my opinion looks good in
1/48 (as reviewed) and even realistic in 1/32 (my guess). However, I do
think that in 1/72 scale the vinyl decals will appear too thick and look
out-of-scale in this modeling scale, so you 1/72’ers lose out here even
if you say that you’ve more aircraft choices – HAHAHA! After less than
30 minutes, I was done!
Highly Recommended.
References:
F-16:
Review and Images Copyright © 2005 by
Ryan Fernandez
Page Created 14 September, 2005
Last updated 15 September, 2005
Back to HyperScale
Main Page
Back to Reviews Page
|
 Home |
What's New |
Features |
Gallery |
Reviews |
Reference |
Forum |
Search
Home |
What's New |
Features |
Gallery |
Reviews |
Reference |
Forum |
Search